precautions should always be followed, including the following:
a) Read all the instructions before using the appliance.
b) To reduce the risk of injury, close supervision is necessary
c) Do not contact moving parts.
d) Only use attachments recommended or sold by the
e) Do not use outdoors.
f) Always place and operate this machine on a clean, flat
g) PINCH HAZARD. AVOID ROLLERS.
h) DO NOT OVERLOAD THE MACHINE.
i) CUTTING HAZARD. AVOID CONTACT WITH THE DIE
j) ADULT SUPERVISION OF CHILDREN RECOMMENDED.
Before attaching handle, remove protective cap on crank shaft and
discard. Then attach handle by sliding washer over hex screw and
inserting through handle and into crank shaft. Tighten hex screw
with hex wrench provided with handle kit. Press end plug over hex
screw until firmly sealed.
– When using this product, basic
when this machine is used near children.
manufacturer.
SAVE THESE INSTRUCTIONS
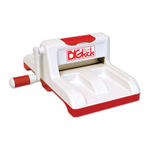
Assembly Instructions
Crank Shaft
Using a Simple Impressions Embossing Folder,
Textured Impressions Embossing Folder
Impressions
With Simple Impressions Embossing Folder, Textured
Impressions Embossing Folder or Embosslits Die open, insert
paper, foil or other embossable material, then close like a book.
Impressions
Multipurpose Platform
(Use no Multipurpose Platform Tabs with 2 1/2" Folders.)
Multipurpose Platform
(Use Multipurpose Platform Tab 1 with Embosslits Dies
and Embossing Folders 4" and wider.)
Place Cutting Pad above and below the closed Folder to
create a "sandwich."
Protective Cap
4" Embossing
Die-cut machine (3 pages)